The MikroTik hAP lite (RB941-2nD-TC) is the result of my search for a cheap but maintained/maintainable LAN router. In this post I’m going to introduce it in a bit more detail for the curious reader.
MikroTik is a Latvia, EU-based company that is well known for its own product line of routers, all running a custom Linux variant called RouterOS, which is also available for x86 PCs but costs license fees. It does, however, also produce hardware, most of which however in my taste looks a bit too cheapish with their colored plastic cases.
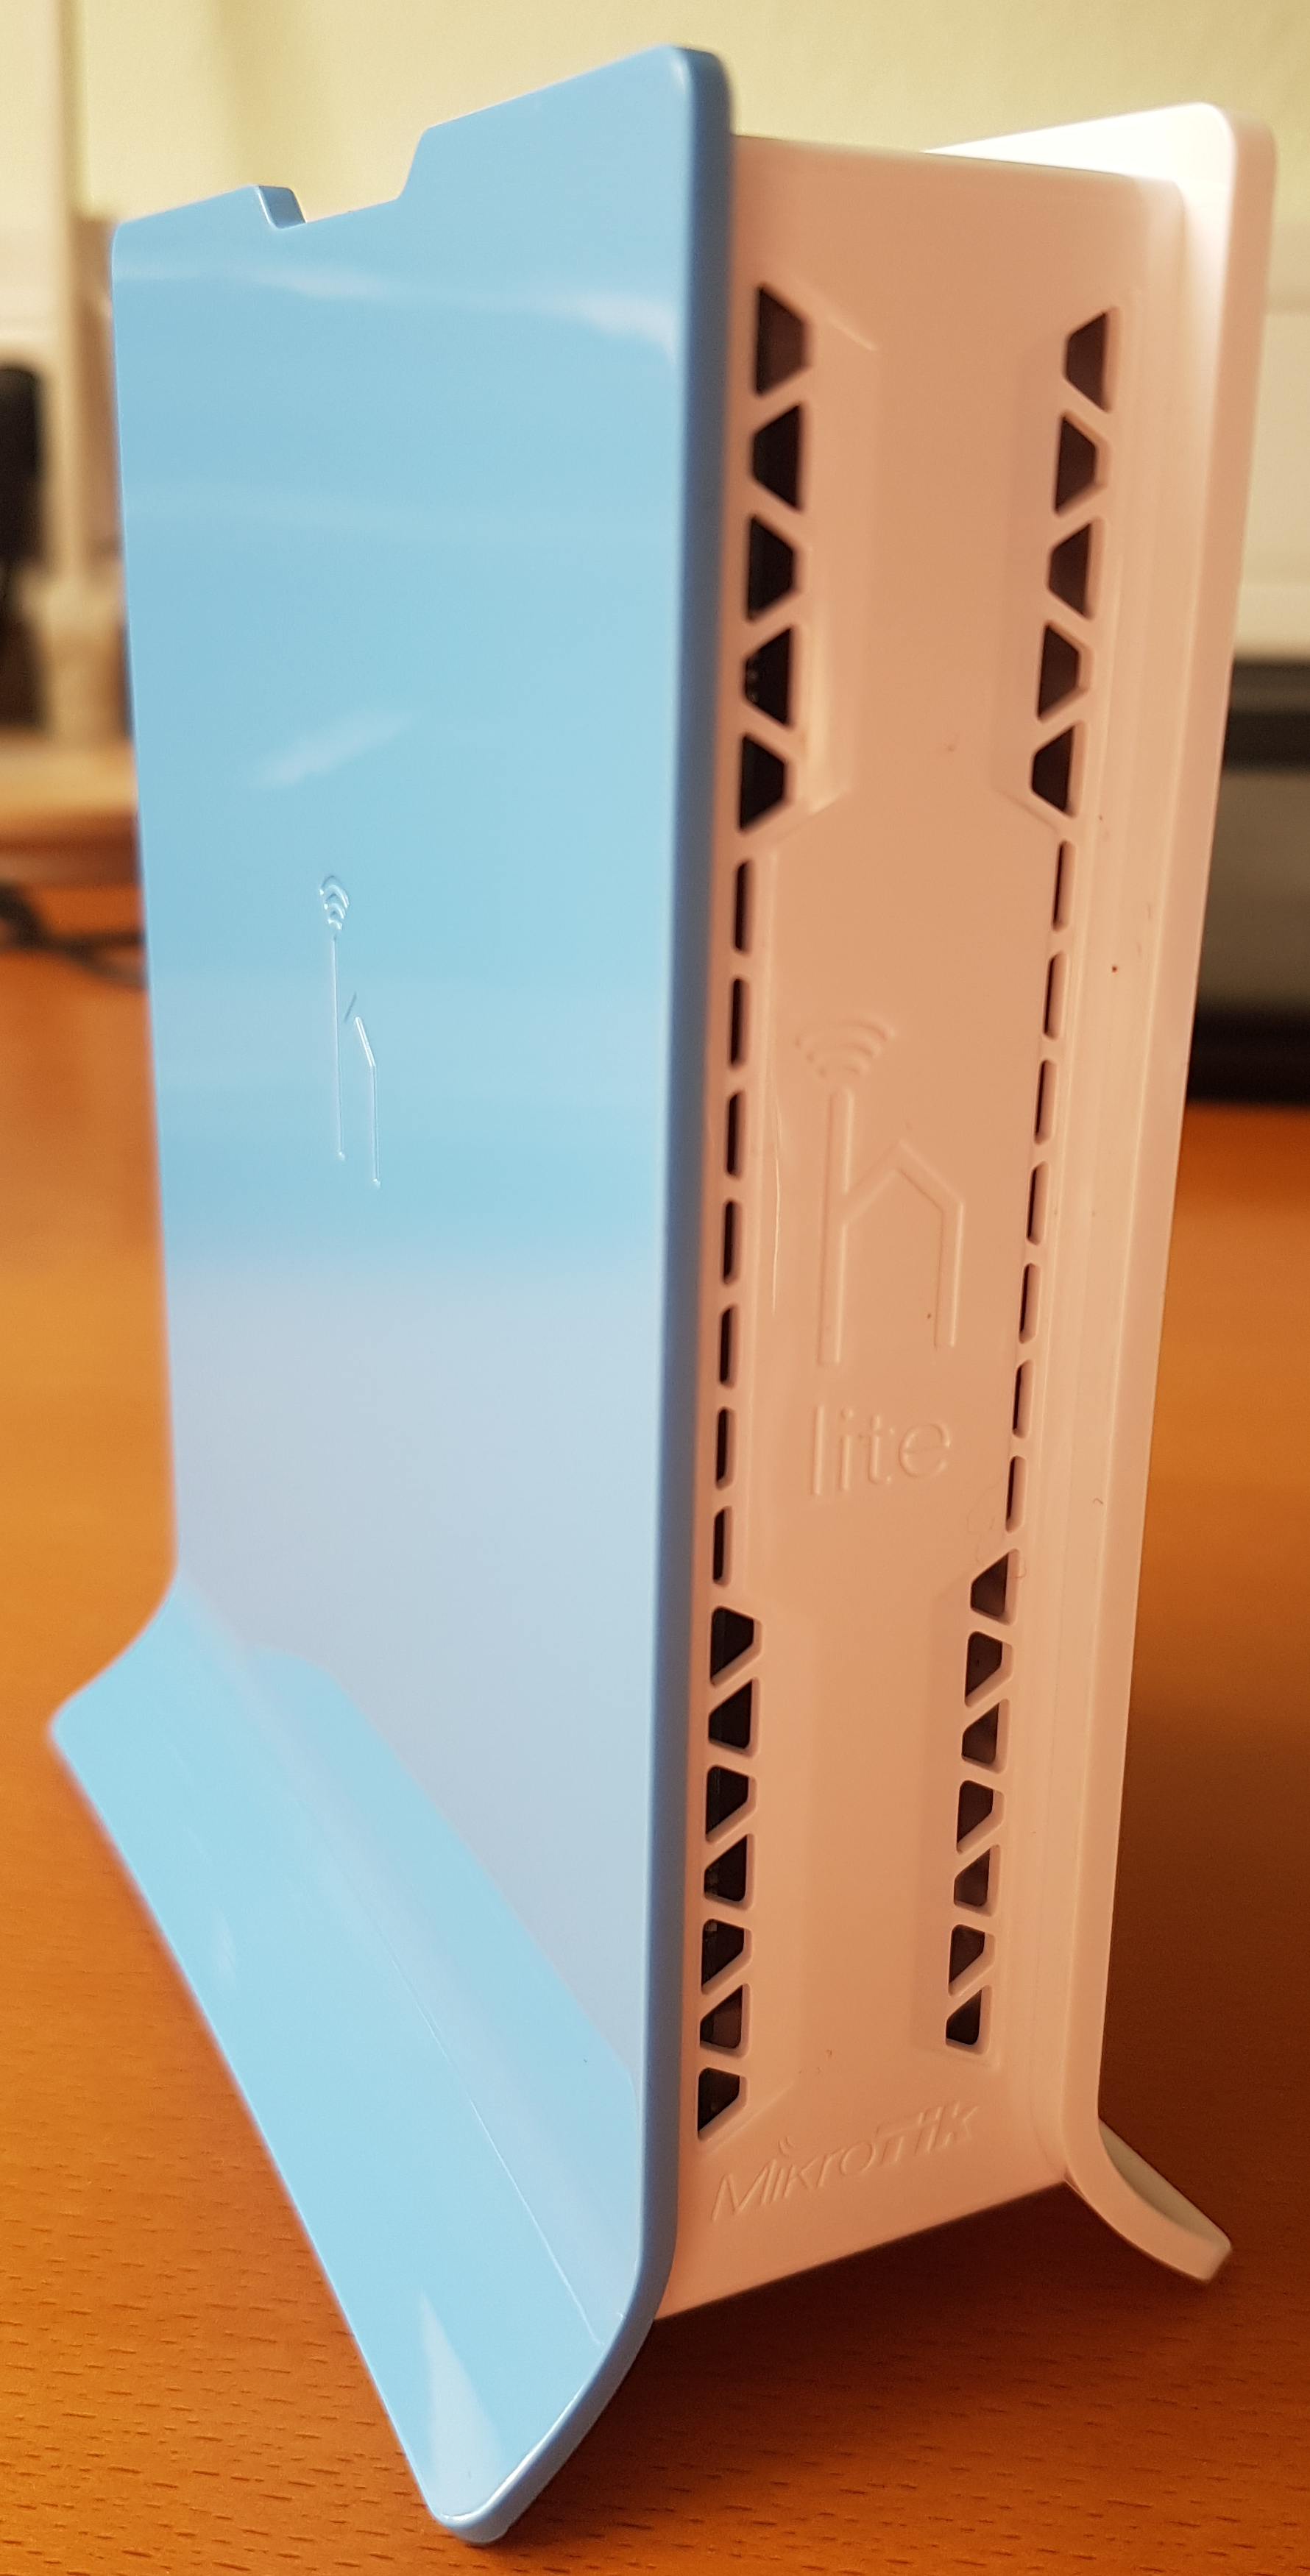
The hAP lite, also knows by its model ID RB941-2nD-TC (Update: the TC stands for “Tower case”, do not confuse this model with the RB941-2nD without TC), is an exception: it’s really tiny, stands upright and is colored with a bright blue side and white plastic otherwise all over:
 |
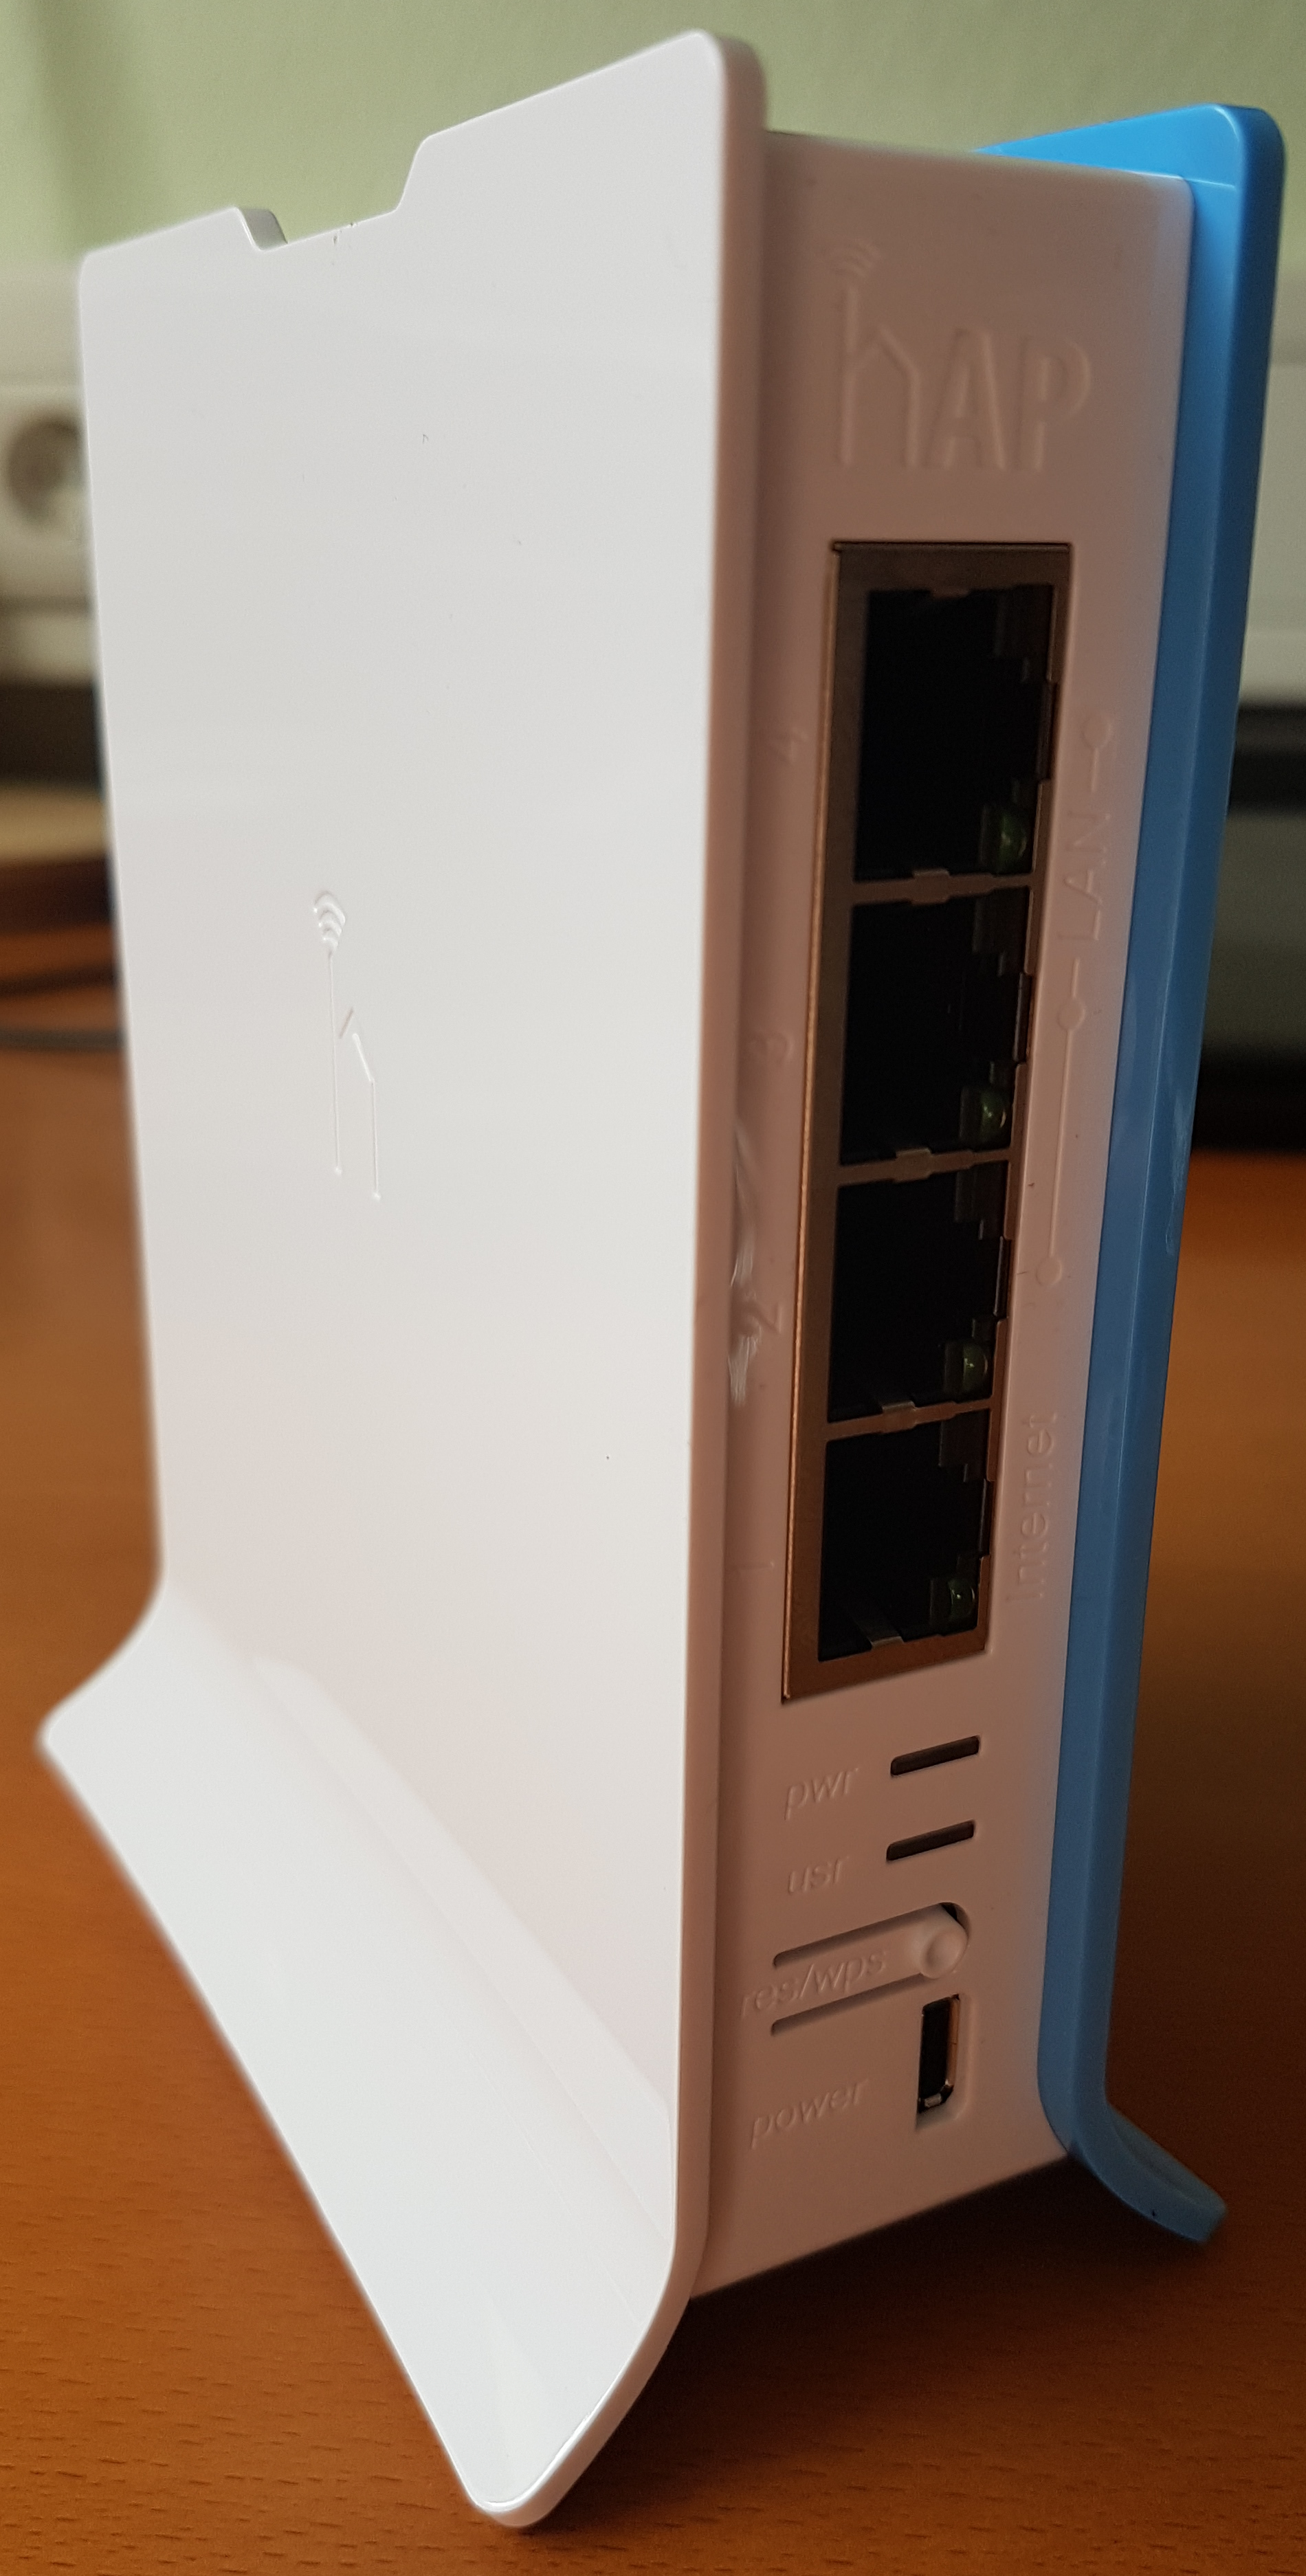 |
MikroTik pleasantly publishes detailed technical specs themselves on their product page, so I’ll just briefly mention that we’re dealing with a board with a Qualcomm/Atheros QCA9533 single-core CPU clocked at 650 MHz, 32 MB of RAM and 16 MB of flash storage. It has an internal 2.4 GHz Wifi antenna and implements IEEE 802.11n at 300MBit. It also features 4 100MBit LAN ports with LAN1 being labeled “Internet”, “Reset/WPS” and a “Mode” push buttons and “Pwr” and “Usr” LEDs. Power comes in through a MicroUSB connector and is specified at a 3.5W maximum, so while the power supply supplied in the box is rated at 1A a smaller one rated at 0.7A should do as well.
So let’s have a look at RouterOS, shall we? There are multiple options to perform RouterOS administration, SSH is an option, there is a Windows executable (eeeew!) but there is also a Web UI, which is what we’re going to look at next here. If we point our browser at the default IP address 192.168.88.1 we’ll only shortly get a glimpse of a login mask. The UI automatically skips it because no login credentials have been set yet.

The Web UI in general is called “WebFig” and this is its “Quick set” tab which we’ll begin with because it’s assumingly a rather simple page. We could switch to the actual “WebFig” UI and to a Terminal using the buttons in the upper right but for now let’s stay here and have a look around.
The first thing you should notice is the drop down box in the upper right next to the “Quick set” text. It provides default configurations for a number of scenarios including the one shown here, “Home AP”, i.e. the router should act as an access point for residential use. Other scenarios defined here include:
- “Basic AP” (in which there is only the Router and the WiFi password to configure)
- “CAP” (“Controlled Access Point”, in which there is a central CAPsMAN server that takes care of management of this device)
- “CPE” (not sure what the acronym means but in this mode the router connects to an existing Wifi network)
- “PTP Bridge AP” and “PTP Bridge CPE” are modes intended to “transparently interconnect two remote locations together in the same network”, whatever that means in detail
- “WISP AP” is similar to “Home AP” but intended to use “industry standard terminology” (sic!)
Let’s not get lost in those but stick to our “Home AP” scenario. You have to look at the page a bit to orientate but in general the left half is dedicated to Wifi settings such as the SSID (here shown as “Network name”) and , the frequency (unfortunately there’s no channel information in the dropdown so you’ll have to know or deduce that 2412 MHz equals channel 1 — very user unfriendly!) and the frequency band which is actually also a mode selection (IEEE 802.11b, IEEE 802.11g or IEEE 802.11n) since this device is 2.4 GHz only. The right half is split in Internet settings, local network settings, VPN settings and the device’s password.
At first sight this looks like a sensible set of settings to expose to a home user. At second thought, however, I must criticize that it’s probably already too much information at once and also presented in a bare-bones fashion that beats even the default OpenWrt Web UI, LuCI. It is not for nothing that usually UIs use an assistant-style series of screens for their initial setup/quick setup processes. But wait, it gets worse on the actual WebFig tab:
WebFig exposes not one, not two, no three navigation areas at the same time:
- the three “tab” buttons in the upper right corner allowing to switch between “Quick set”, “WebFig” and “Terminal”.
- the vertical menu bar to the left in which some buttons change the main area right of it, some expand into submenus and some act as buttons or switches only.
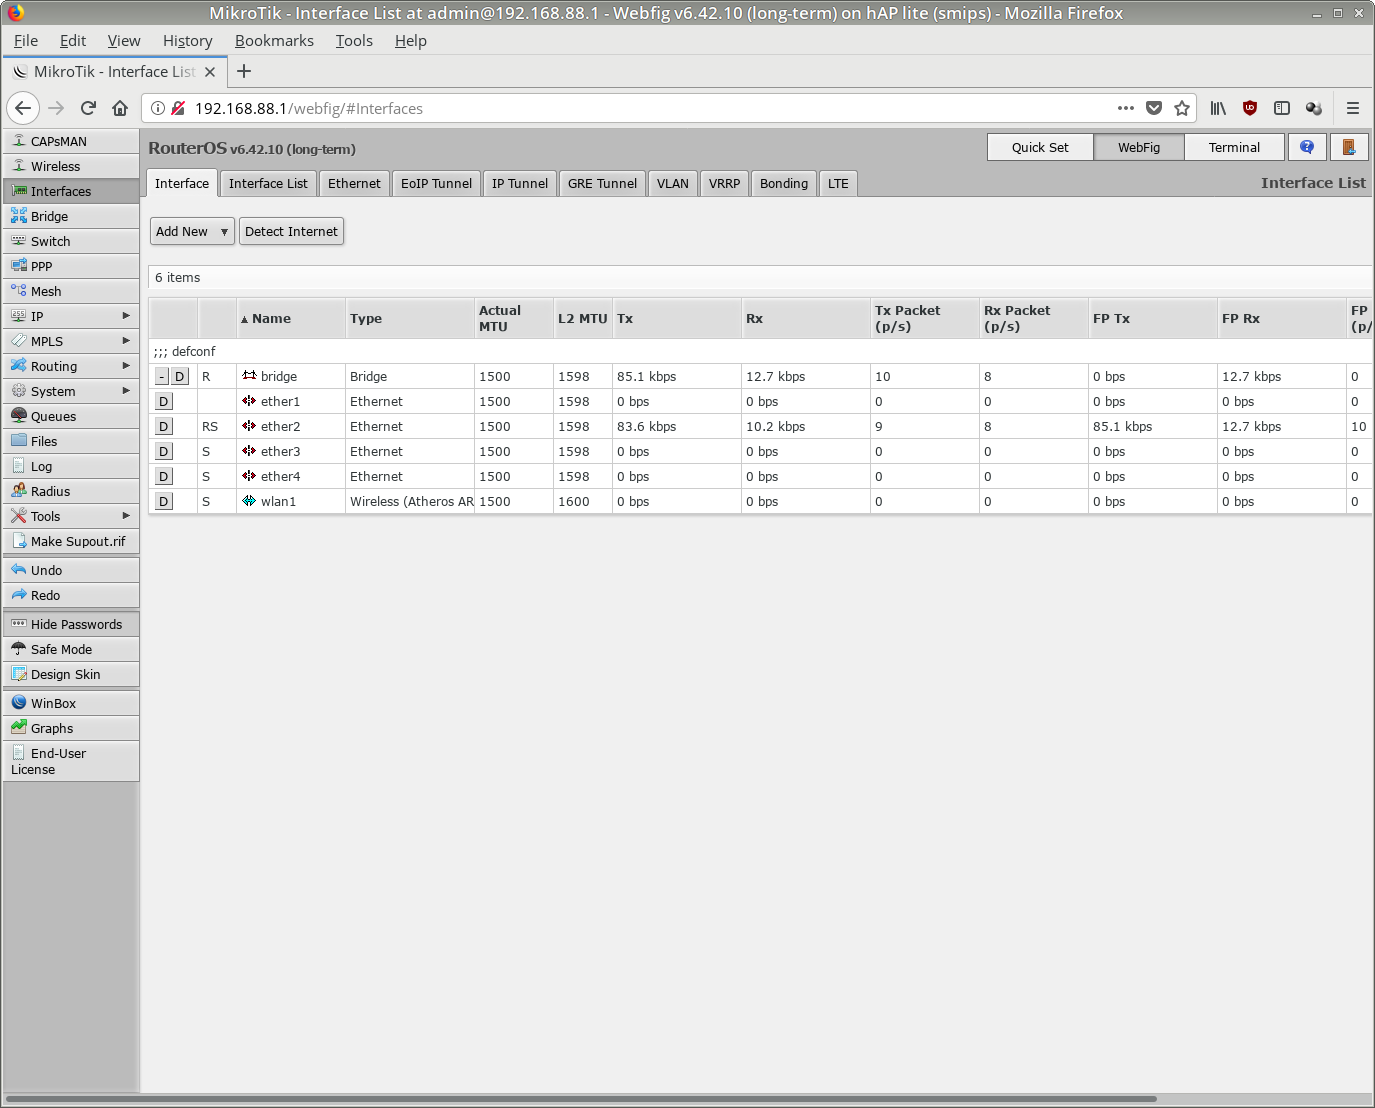
- on some pages such as the “Interfaces” page there’s another horizontal menu bar below the “RouterOS” text.
Seriously, I know the challenge in presenting a lot of configuration options in an accessible manner but this is clearly an expert’s tool in that you need to be an expert already to navigate it.
This impression is reinforced by some unfortunate naming decisions (what, for example, is the difference between “Interface” and “Interface list” seeing that the “Interface” tab shows more than a single interface?) and excessively brief button labels such as “D” (could mean “Details”, “Delete” but is actually “Disable”) and the general lack of any help texts whatsoever. And the “question mark” icon the upper right (which is, of course, not context-sensitive) does not link to help texts included on the device itself but is merely a link to MikroTik documentation in form of… a Wiki. Yawn.
Yes, I do acknowledge that the experienced expert will quickly find what she is looking for but merely because she’s seen the Web UI before. Yet there are numerous counterexamples of Web UIs that succeed in making a variety of information available without immediately swamping the user and no, they do not hide everything behind assistants. Think of, for example, the OpnSense UI. It also has its points to criticize (e.g. missing consistency in subscreens) but the general navigation is crisp-clear and textboxes are usually augmented with short but descriptive help texts.
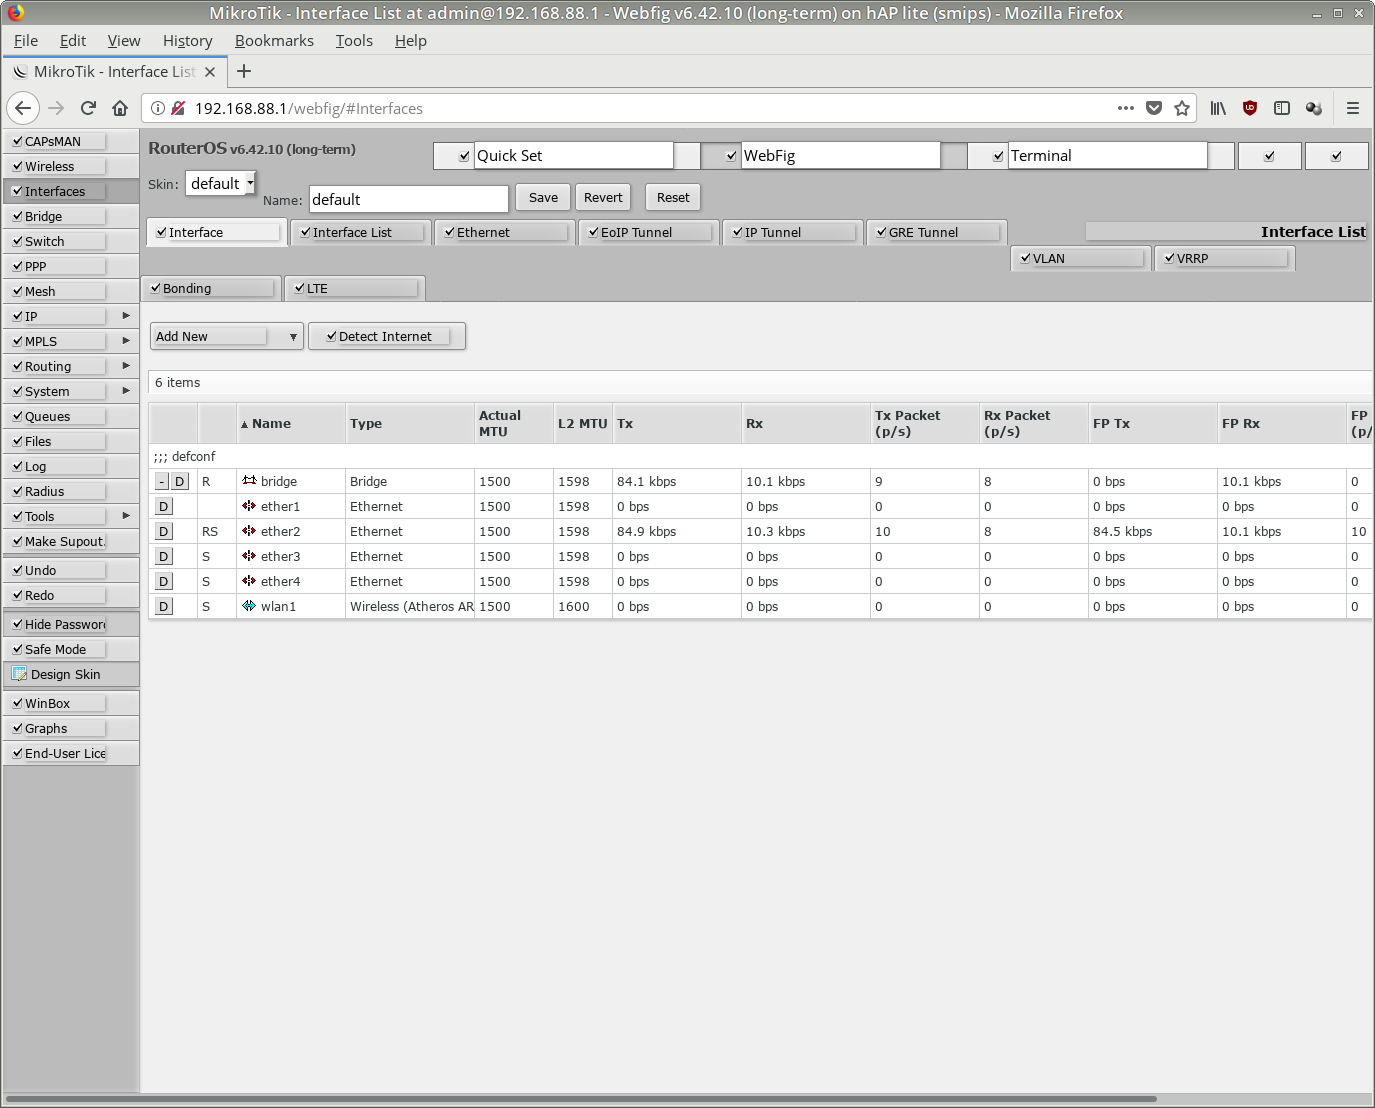
Another feature of which I acknowledge that it is certainly powerful, but nonetheless, well, surprising to see having been implemented, given that the things I just mentioned that could have been better given priority to, is the ability to customize the UI in terms of being able to hide buttons, tabs, pages etc. as soon as the “Design Skin” button in the left vertical menu bar is pressed:
At this point, as you might already have guessed, I’ve already decided that RouterOS is probably not going to be the right solution for me. It would take too much time to work myself into and still strike me with functionality I do not actually need. Frequent readers of my blog know that I’m a strong defender of OpenWrt and it once again shows that its core feature, its modularity and cleanliness are still unparalleled. The Web interface LuCI certainly has its own points to criticize but there’s always the terminal. Speaking of which, another final screenshot of the terminal integrated into the Web UI:
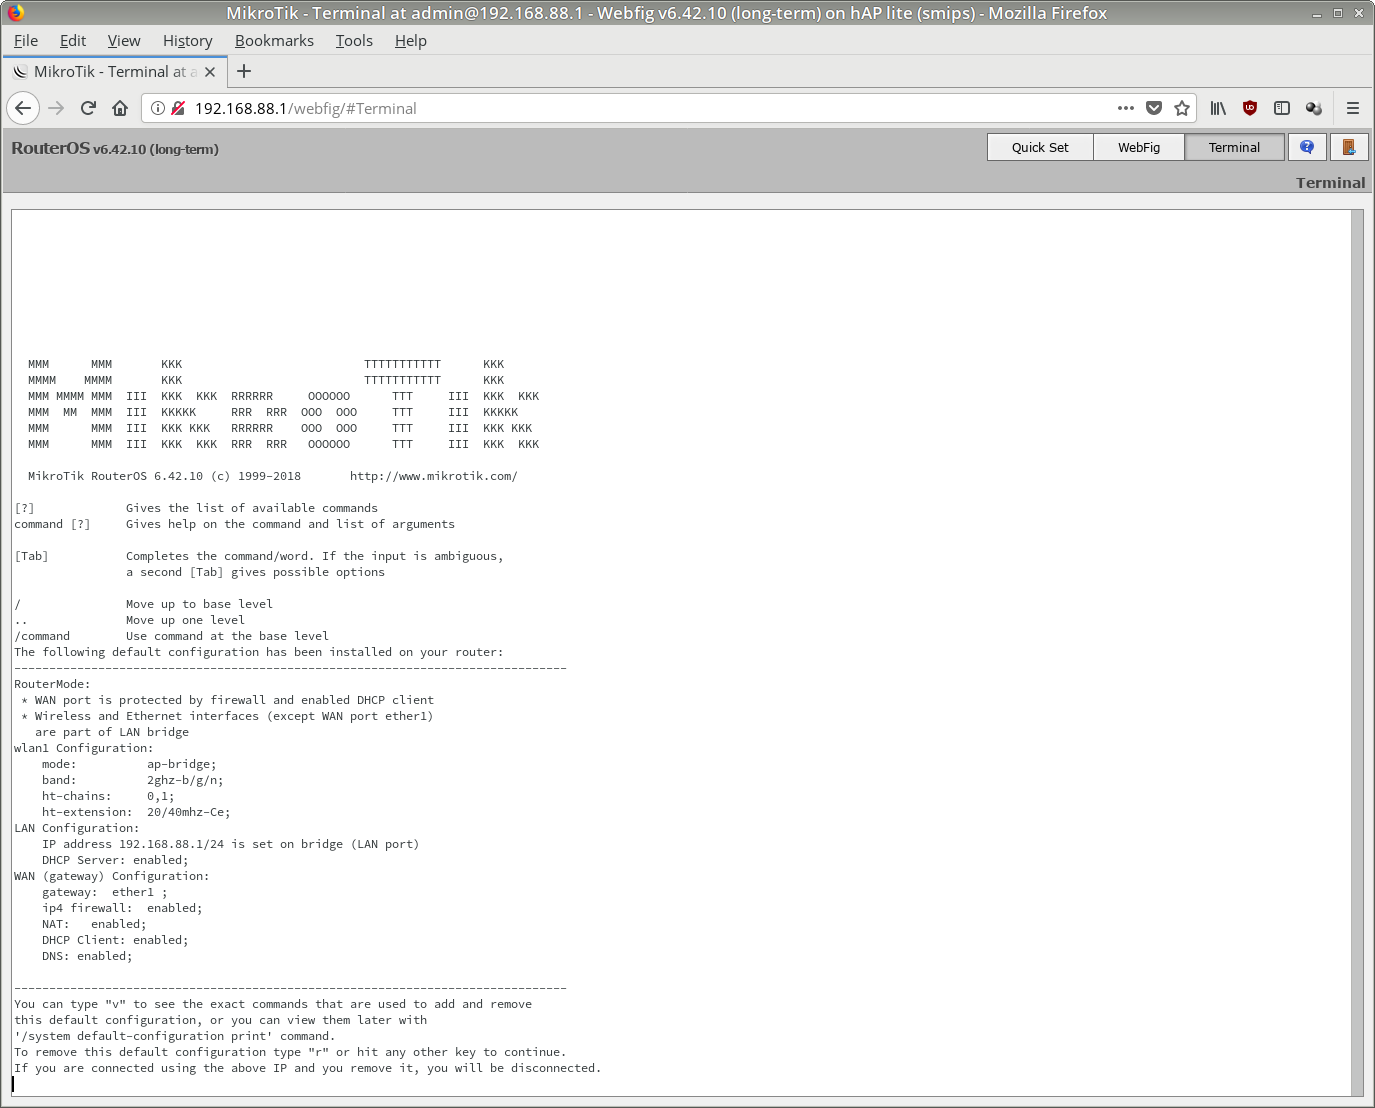
Well, it’s not a Bash. Just like with other vendors, it’s a RouterOS-specific command line CLI language that you’d have to learn and which I also, having only briefly skimmed it, consider rather hard to get used to. But I have already disclosed my OpenWrt fandom, so there :)
One final note: if you intend to flash OpenWrt, be sure to export the RouterOS license from the device beforehand! There is a a special OpenWrt wiki page for this process.